RichardWattUK
- 12
- 1
- TL;DR Summary
- Measurement parameters required for a ZK worm
I apologise for cross-posting - I've already posted this question on CrazyEngineers but have had no replies after a few days and I was wondering if someone here could help me:
In my current job, I am responsible for maintaining an existing software application that generates a dressing program for a CNC external thread grinding machine which includes the ability to grind worms (ZI, ZA, ZN, ZK forms). I am trying to confirm the input parameters that are actually necessary for the ZK form worm because the software was written using a worm definition dialog box with the following input fields:

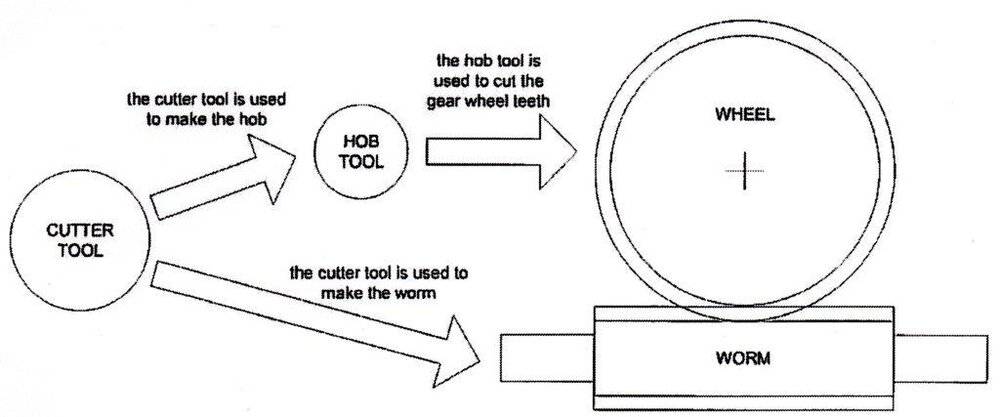
Now the calculation process creates a profile for the grinding wheel (generating tool) and the worm profile on the axial plane (so along the worm component) which is summarised in the diagram below:

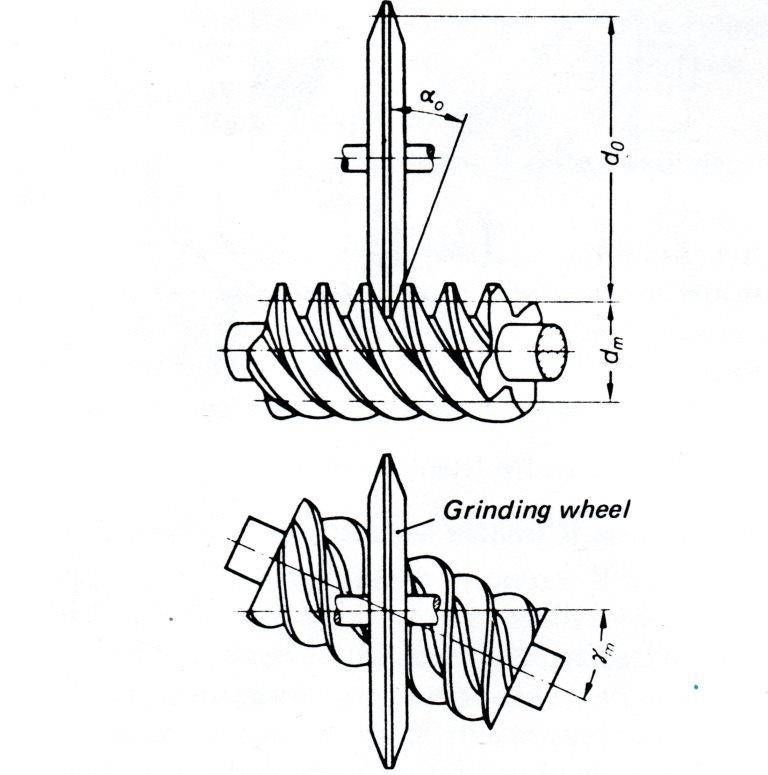
The code I'm trying to check is the part that generates the cutter tool profile as our CNC machine grinds the worm gear itself and not the worm wheel.
We check the parts we grind in-house on a Wenzel GearTec machine that accepts a number of parameters but it only asks for the grinding wheel diameter and the grinding wheel thickness - both of these are as measured at the reference (pitch) circle diameter on the worm profile, but the code accepts more parameters than this.
I've tried to find this information on the internet, but to no avail so far, so it may be that I'm using the wrong terms.
What I'm trying to find out is what parameters would you take from a ZK worm drawing to generate the profiles? I do have a copy of MITCalc I can install on a trial basis and check out what they have, but they do have a lot of detailed information they can accept and calculate to give a full picture of the worm design and characteristics.
Many thanks in advance.
In my current job, I am responsible for maintaining an existing software application that generates a dressing program for a CNC external thread grinding machine which includes the ability to grind worms (ZI, ZA, ZN, ZK forms). I am trying to confirm the input parameters that are actually necessary for the ZK form worm because the software was written using a worm definition dialog box with the following input fields:
- Worm Data:
- Worm Name / ID
- Worm Type (Single Lead / Dual Lead)
- Lead Hand (RH / LH)
- Number of Starts
- Reference Circle Diameter (in mm)
- Tip Diameter (in mm)
- Root Diameter (in mm)
- Spindle Setting Angle (in degrees)
- Thinnest GROOVE to REF distance (in mm)
- Workpiece stock allowance per side (in mm)
- Lead (in mm) (Lead 1 and/or Lead 2)
- ZK Tool Data:
- LH Flank Angle (in degrees)
- RH Flank Angle (in degrees)
- Spindle Setting Angle (in degrees)
- Tip Fillet Radius (in mm)
- Root Fillet Radius (in mm)
- Tip Width (in mm)
- Tip Diameter (in mm)
Now the calculation process creates a profile for the grinding wheel (generating tool) and the worm profile on the axial plane (so along the worm component) which is summarised in the diagram below:
The code I'm trying to check is the part that generates the cutter tool profile as our CNC machine grinds the worm gear itself and not the worm wheel.
We check the parts we grind in-house on a Wenzel GearTec machine that accepts a number of parameters but it only asks for the grinding wheel diameter and the grinding wheel thickness - both of these are as measured at the reference (pitch) circle diameter on the worm profile, but the code accepts more parameters than this.
I've tried to find this information on the internet, but to no avail so far, so it may be that I'm using the wrong terms.
What I'm trying to find out is what parameters would you take from a ZK worm drawing to generate the profiles? I do have a copy of MITCalc I can install on a trial basis and check out what they have, but they do have a lot of detailed information they can accept and calculate to give a full picture of the worm design and characteristics.
Many thanks in advance.